
Many people dream of starting a garden but don’t have a yard. Maybe you live in an apartment. Maybe you’ve got a condo with a small balcony. Houseplants are great, but nothing beats thriving outdoor flowers and veggies under real sunlight. Growing a garden in a box planter on your balcony is a great way to go!
I was once in the same boat: third-floor apartment, no ground access, but a west-facing balcony with afternoon sun. I started with a simple plastic box planter mounted to the railing, filled with dwarf red salvia, pure white vinca, and trailing English ivy. Those became my “babies” that summer and sparked my obsession with gardening.
You can do the same with a DIY hanging balcony box planter (also called an over-the-railing planter box). It’s budget-friendly, beginner-proof, and adds instant curb appeal (or balcony charm). Let’s get started!
Step 1: Choosing the Right Planter
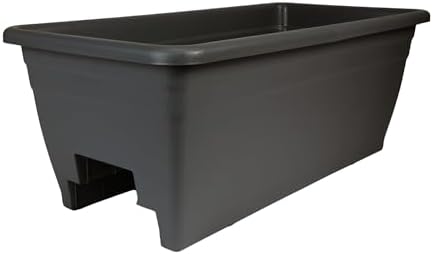
🌿 Basic Plastic Rectangular Planter
This is what I started with. Simple. Affordable. About 6 inches deep and 24 inches long.
Pros:
- Budget-friendly
- Lightweight
- Easy to mount
Watch out for:
Many don’t have drainage holes. That’s actually helpful if you have neighbors below you (no one wants muddy water dripping down), but it means you’ll need to manage drainage yourself.

💧 Self-Watering Planter
These come with a built-in water reservoir underneath.
Why they’re great:
- Prevent overwatering
- Reduce daily maintenance
- Ideal for hot, sunny balconies
They cost more upfront but make life easier, especially if you’re busy or travel.
🌱 Planter with Coco Fiber Liner
These have a metal frame and natural fiber insert.
Best for:
- Window mounting
- Areas without downstairs neighbors
- Maximum drainage
They also look beautiful and classic.
Step 2: Use the Right Soil (This Matters More Than You Think)
Please don’t just scoop dirt from the ground.
Ground soil is too dense, lacks proper nutrients, and won’t drain correctly in a container. That’s how plants drown.
Instead, use quality potting mix. It’s lighter, drains well, and contains nutrients your plants need.
For beginners, keep it simple. Choose a trusted brand so you’re not troubleshooting soil problems your first year. There’s plenty to learn already, no need to complicate it. For this, I prefer to start with Miracle-Gro.
💡 Drainage Trick for Planters Without Holes
If your planter doesn’t have drainage holes:
- Add 1–2 inches of small rocks at the bottom.
- This gives excess water somewhere to go.
- It helps prevent waterlogged roots.
Leave about 1–2 inches of space between the soil and the rim so watering doesn’t overflow.
Step 3: Keep Planting Day from Becoming a Disaster
Filling planters is messy.
If you live in an apartment, you probably don’t want soil all over your floor. I’ve seen people pot their plants in a large plastic tote. However, if you live in an apartment, you probably don’t have space to store a giant plastic bin just for planting once a year.
A foldable repotting mat works perfectly:
- Catches loose soil
- Easy cleanup
- Folds up small for storage
Problem solved.
Step 4: Planting Your Garden
Now for the fun part.
Take your seedlings out of their containers and gently loosen the roots. Make small holes in your soil based on the spacing recommendations on the plant tag. I found with container gardens, where space is limited, you can plant your flowers a bit closer than recommended.
Place each plant into its hole, cover the roots fully, and press the soil lightly around the base. Then give everything a gentle watering to help them settle in.
And just like that… you have a garden.
Step 5: Don’t Skip Mulch (Especially on a Balcony)
Balcony planters dry out faster than in-ground beds. They’re exposed to wind and sun from all sides.
Mulch helps:
- Retain moisture
- Regulate soil temperature
- Reduce watering frequency
Bark mulch works, but it can feel bulky in smaller boxes. I personally, do not like using bark in pots or planters. If you want something finer, cocoa bean shell mulch spreads evenly. This is my go to. It even smells like chocolate on warm days.
Just leave about an inch of space free of mulch around each plant stem so water can drain properly. Otherwise, water stays pooled by the roots and fungus will start to grow on your roots.
Step 6: Mounting Your Planter
It’s much easier to plant while the box is on the ground, then mount it after.
Once everything is planted:
- Lift the planter into position.
- Secure it to your railing or brackets.
- Double-check that it’s level and stable.
Potting mix is much lighter than ground soil, so it’s usually manageable.
Step 7: Caring for Your Balcony Planter
This isn’t a “set it and forget it” situation.
💦 Watering
Check the soil regularly. If the top inch feels dry, it’s time to water.
Apartment tip:
If your water is softened, it may contain salt that plants don’t love. Check with your landlord whether your tap runs on hard or softened water. Many cold water kitchen taps are plumbed to the hard water line just for this reason.
🌼 Fertilizing
Like soil, you’ll learn what fertilizers you like. But Miracle-Gro is a great starting point.
Keep it simple your first year. Pick a balanced fertilizer and use an easy schedule.
I usually fertilize every other week. Make it part of your Sunday routine to keep it easy!
Why Box Planter Gardening Is Perfect for Beginners
Starting with a balcony planter:
- Requires very little space
- Costs less than building raised beds
- Builds confidence quickly
- Gives fast visual results
It’s the perfect way to “test the waters” before diving deeper into gardening.
Enjoy It
At the end of the day, this is about enjoyment.
Step outside in the morning with coffee and look at something you grew. Harvest a tomato. Watch flowers bloom. Notice how your balcony feels different when it’s alive.
If this is your first garden, you’ll probably start small.
You probably won’t stay small for long.
There are worse addictions.